
Reviewed · BROOKLYN BRIDGE & DUMBO TOURS
Brooklyn Bridge at Night Photography Tour
Night photos in NYC can feel like luck. This tour turns it into a skill.
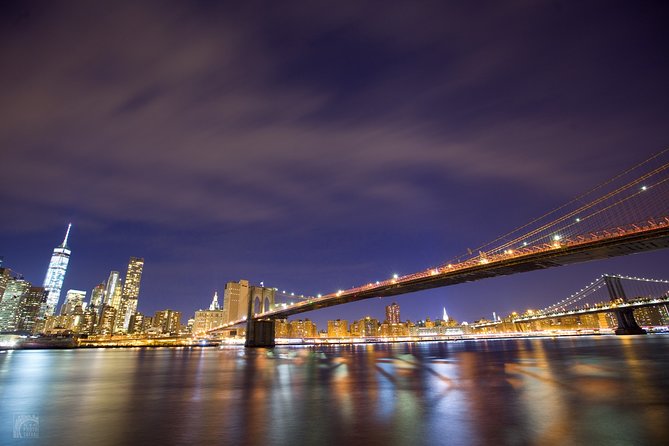
What I like most is the small group setup (max 6), so you’re not stuck guessing what settings to use or where to stand. I also love that you’re guided to real viewpoints—first on the Brooklyn Bridge itself, then along Brooklyn Bridge Park—so the night skyline doesn’t just look pretty, it becomes something you can compose. One thing to consider: this is a walking, night-time photo session, and the weather matters (a past group noted it was bitterly cold), so wear layers and expect to stand around for shots.
Zim is one of the instructors people rave about, and the teaching shows up in the details: you’ll practice advanced techniques like bracketing and bulb mode, and the guide will help you correct exposure and think through compositions instead of just pointing at landmarks. If you run into a small tech hiccup, the company also seems to handle support quickly—at least one guest described Mike helping correct an issue over the phone.
In This Review
- Key Things You’ll Notice on This Night Photo Tour
- Meeting at 8:30 PM in DUMBO: Where the Tour Starts and Why It Matters
- Stop 1: Brooklyn Bridge From the Bridge Itself (Not Just From the Sidewalk)
- Stop 2: Brooklyn Bridge Park Skyline Views and the Landmark Trivia You’ll Actually Use
- Stop 3: Manhattan Bridge Framing From the Park (Short, Focused, Worth It)
- How the Instruction Actually Improves Your Photos (Bracketing, Bulb Mode, Composition)
- Price and Value: Is $150 Worth It for a 1 Hour 50 Minute Shoot?
- Planning Your Camera and Clothing for a Night Bridge Walk
- Who Should Book This Tour (and Who Might Want a Different Option)
- Should You Book Brooklyn Bridge at Night Photography Tour?
- FAQ
- What does the Brooklyn Bridge at Night Photography Tour cost?
- How long is the tour?
- What time does the tour start, and where do I meet?
- How big is the group?
- What’s included in the tour price?
- Is hotel pickup or transportation included?
- Is the tour affected by weather?
Key Things You’ll Notice on This Night Photo Tour
- Max 6-person group coaching: you get real-time guidance instead of a crowd shuffle.
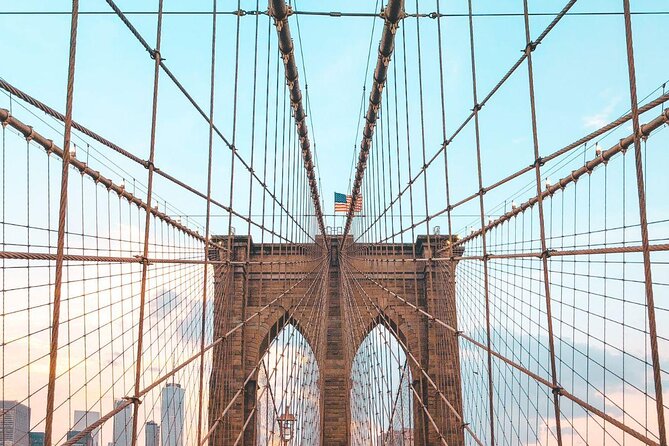
- On-bridge shooting time: you photograph the Brooklyn Bridge while you’re still on it.
- Brooklyn Bridge Park skyline viewpoints: you’ll frame Manhattan’s major landmarks from multiple angles.
- Manhattan Bridge photo stop: a focused, shorter segment gives you a clean second bridge perspective.
- Night-photo skill practice: instruction includes bracketing and bulb mode concepts.
- Pro photographer guide support: the teaching style is hands-on, with corrections to settings and composition.
Cross it again: more Brooklyn Bridge and DUMBO walks
- Brooklyn Bridge & DUMBO Food Tour: Local Eats & Landmarks
★ 5.0 · 478 reviews - From Manhattan: 2-Hour Brooklyn Bridge Bike Tour
★ 4.4 · 230 reviews - NYC: Brooklyn Bridge and Dumbo District Walking Tour
★ 4.7 · 200 reviews - Brooklyn Heights, DUMBO and Brooklyn Bridge guided tour in French
★ 5.0 · 117 reviews
Meeting at 8:30 PM in DUMBO: Where the Tour Starts and Why It Matters
This experience starts at 8:30 pm and ends back at the same meeting point, Wholesome Farms Market, 108 Jay St, Brooklyn. That might not sound thrilling on paper, but it matters at night. You’re less likely to lose time chasing directions, and you get to begin the session while the lighting is already in the sweet spot for bridge-and-skyline photos.
The tour is run by New York City Photo Safari, and you’ll be traveling with a professional photographer guide. The group size is capped at 6, which changes the whole vibe. Instead of one instructor explaining to everyone at once, you’re more likely to get quick corrections—things like how to tweak exposure or how to reframe a shot so the bridge lines lead the eye.
Also, this tour uses a mobile ticket, and it’s offered in English. If you’re planning around the city’s subway rhythms, you’ll also like the location: it’s near public transportation, and there’s a practical route described from Grand Central Terminal/Metro North—transfer to the 4/5/6 downtown, then take the A train. In other words, you don’t have to rely on a car or taxi to get set up.
One small practical reality: because it’s a night shoot, you’ll want to show up with a camera ready to work fast. If you’re still learning where your buttons are, do yourself a favor and get settled early so the guide can help you focus on photography, not fiddling.
Stop 1: Brooklyn Bridge From the Bridge Itself (Not Just From the Sidewalk)
The first stop is the Brooklyn Bridge, with about 1 hour 30 minutes there. The best part is that you’re photographing the bridge while you’re on the bridge, not just from a distance.
That changes your photos in two ways:
First, you get a true sense of scale. The bridge’s cables and towers aren’t flattening into a tiny postcard view; they stretch across your frame in a way that feels architectural. Second, you get natural movement in the composition. As you walk, the skyline shifts behind you, and that lets you create a set of images rather than a single shot.
The guide’s job here isn’t only to recommend where to stand. The value is in helping you translate the scene into a workable camera plan for nighttime. In past sessions, instruction has included bracketing and bulb mode concepts—both are useful because nighttime lighting can jump from bright highlights (skyline lights) to darker areas (bridge shadows).
A bonus of shooting from the bridge: you’ll naturally cover different framing angles without needing to hunt for a new location every five minutes. The skyline stays in play, so you’re building a visual set: wide shots for context, tighter frames for cables, and angles that use lights as foreground accents.
Possible drawback at this stop: you’re walking and standing on an active structure at night. Expect wind, uneven footing, and a need to keep moving safely. That cold note from a past group makes total sense. Bring warm layers even if you think you’ll be fine.
Stop 2: Brooklyn Bridge Park Skyline Views and the Landmark Trivia You’ll Actually Use
After the bridge, you shift into Brooklyn Bridge Park. This part is free to access (no admission ticket needed) and it’s where the tour leans hard into viewpoint variety.
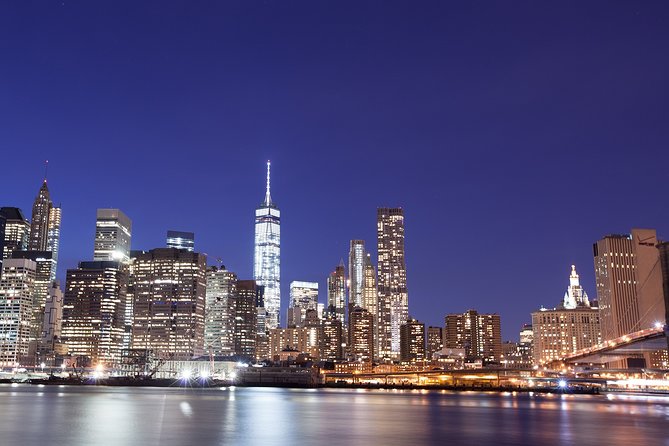
From here, you’ll see a lineup of Manhattan landmarks that photographers love because they’re bright, geometric, and identifiable even in low light. The tour highlights include views of:
- World Trade Center
- Chrysler Building
- Empire State Building
And yes, the skyline perspective from the park is often what makes people book this tour in the first place. But what I like is that the guide goes beyond naming buildings. In one highlighted detail, you’ll hear a correction to a common misconception: it’s actually the Woolworth Building—not the Empire State Building—that helped spark the big building boom. That kind of tidbit isn’t trivia for trivia’s sake. It encourages you to look at the skyline with attention to shape and era, which makes it easier to compose with intention.
This stop also includes some “photo logic” you can feel. The park gives you stable vantage points for longer exposures, and it’s easier to stand, test settings, and refine framing. That’s where instruction can pay off quickly: if you’ve been struggling with exposure, the guide can help you adjust for the bright lights and the darker bridge structure so your images don’t wash out.
One practical note: the skyline looks different depending on which direction you face. The tour’s pacing helps here. You don’t just stare at one view; you’re set up for multiple angles, which gives you more usable shots when you get home.
Deeper into Brooklyn, a few more picks
Stop 3: Manhattan Bridge Framing From the Park (Short, Focused, Worth It)
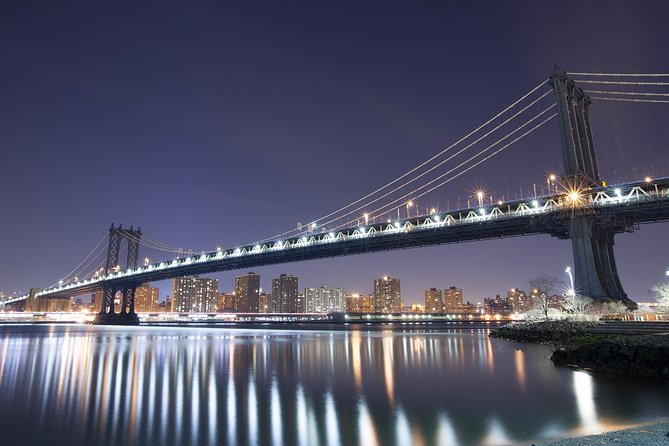
The final photo stop is Manhattan Bridge, photographed from Brooklyn Bridge Park. You get about 20 minutes here, so it’s not long—but it’s a smart use of time.
Why? Because after spending time on the Brooklyn Bridge and working the skyline, you already have a mental map of your composition choices: foreground lines, symmetry, and how the bridges intersect with Manhattan’s lights. The Manhattan Bridge stop turns that into a quick second subject without draining the evening.
You’ll be aiming for that “bridge within a city” feeling—long structural lines against a night backdrop. Short sessions like this can work well because the guide can focus on a handful of shots rather than asking you to manage everything at once.
If you’re the type who loves to keep your camera busy without overthinking, this segment gives you a clean payoff: you wrap up with a second bridge that feels different from the Brooklyn Bridge, even though the vantage point comes from the park.
How the Instruction Actually Improves Your Photos (Bracketing, Bulb Mode, Composition)
The photos are the obvious draw, but the reason this tour gets a steady 5-star reputation is the instruction style. In past groups, the guide approach has been described as professional, punctual, and very focused on camera technique—not just sightseeing.
Here are the specific skills you should expect to practice:
Bracketing for night exposures
Night scenes can contain both extreme highlights and deep shadows. Bracketing gives you a series of exposures so you can choose the one that balances the skyline brightness and bridge detail. If you’ve ever wondered why one photo looks perfect while another from the same spot is too dark or blown out, this is the fix you’ll be taught.
Bulb mode and long exposure control
Bulb mode can be a game-changer for night bridge shots, but only if you understand when it helps and how to use it without turning your image into a blurry mess. The tour’s teaching has specifically included bulb mode, so it’s not just a vague mention—it’s part of the session’s actual workflow.
Composition tweaks you can apply immediately
People have noted the guide encouraging them to think out of the box with compositions. That’s key. At night, it’s easy to default to the obvious postcard framing. But the better approach is learning how to place the bridge lines, how to use darkness around the skyline as framing space, and how to make the lights lead your viewer’s eye.
One more subtle value: the guide is constantly checking exposure and composition choices. That kind of correction loop matters more at night than in daylight because mistakes show up instantly—blown highlights, dark towers, or a horizon that feels slightly off.
And because the group is small, it’s realistic to get feedback tailored to your setup, not just generic advice.
Price and Value: Is $150 Worth It for a 1 Hour 50 Minute Shoot?
The price is $150 per person, and the tour runs about 1 hour 50 minutes. That can sound steep until you compare it to what you’re buying:
- A professional photographer guide
- Hands-on nighttime instruction (not just a walk with tips)
- Multiple photo stops designed for skyline and bridge angles
- A small group cap (max 6), which usually means more attention per person
- A guided plan for tough night settings, including bracketing and bulb mode
If you’re visiting NYC and you already know your way around cameras, you still might get value from the structured shooting points. But the real payoff is for anyone who wants to move beyond guessing. At night, guessing costs time. This tour tries to reduce that wasted time by giving you a plan and feedback while you’re out there.
Also, it’s typically booked around 20 days in advance on average. That’s a signal that people who care about night photography tend to commit early—so if you’re set on going, plan ahead instead of waiting for a last-minute decision.
Finally, admission is free for the stops mentioned, so you’re not paying extra for museum fees or timed entry. You’re paying for instruction and a guided photo route.
Planning Your Camera and Clothing for a Night Bridge Walk
The tour doesn’t list specific gear requirements, so I can’t tell you what brand or model you must bring. But you can prepare in a way that increases your odds of getting good results from the instruction.
If your camera supports bracketing and longer exposures, you’ll likely get more from the lessons on those techniques. If it doesn’t, you can still learn composition and exposure concepts—just expect the camera settings menu to look different.
For clothing, assume night air on a bridge can be harsh. One group specifically mentioned it being bitterly cold. Wear layers you can move in, and consider gloves. You’ll be holding your camera and standing for bursts of time while the guide helps you nail exposure and framing.
Safety-wise, keep your focus on safe footing and don’t block other people. On bridge walkways, good photos come from steady positioning and timing, not rushing.
Who Should Book This Tour (and Who Might Want a Different Option)
This is a good fit if:
- You want real photography instruction at night, not a generic skyline walk
- You like having a guide who corrects exposure and composition decisions
- You want both Brooklyn Bridge and Manhattan skyline frames in one session
- You’d enjoy a structured learning experience with advanced night techniques
It may be less ideal if:
- You hate walking at night or get uncomfortable standing still for photos
- You’re expecting a mostly casual, low-effort sightseeing stroll
- You want to drive the itinerary on your own without coaching
Group size matters here. If you’re traveling with friends and you want one-on-one attention, the max of 6 helps a lot. If you’re looking for a solo wandering experience, you might feel the boundaries of a scheduled photo plan.
Should You Book Brooklyn Bridge at Night Photography Tour?
I’d book this tour if your goal is to leave with better night photos and a clearer camera workflow. The combination of small-group coaching, on-bridge shooting time, and practical night techniques like bracketing and bulb mode is exactly what turns a cool view into repeatable results.
If you’re just hoping to take a quick skyline snapshot on your phone, you might be better served by a self-guided walk. But if you care about learning—and you’re willing to dress for cold, night air, and a bit of walking—this is a strong value use of an evening in NYC.
FAQ
What does the Brooklyn Bridge at Night Photography Tour cost?
It costs $150.00 per person.
How long is the tour?
The duration is about 1 hour 50 minutes.
What time does the tour start, and where do I meet?
It starts at 8:30 pm. You meet at Wholesome Farms Market, 108 Jay St, Brooklyn, NY 11201, USA, and it ends back at the meeting point.
How big is the group?
The maximum group size is 6 travelers.
What’s included in the tour price?
A professional photographer guide is included. You also receive a mobile ticket.
Is hotel pickup or transportation included?
No. Hotel pickup and drop-off, and transportation to and from attractions, are not included.
Is the tour affected by weather?
Yes. The experience requires good weather. If it’s canceled due to poor weather, you’ll be offered a different date or a full refund. Free cancellation is available up to 24 hours in advance for a full refund.
Your Brooklyn Trip, Shot by a Pro
- Photo sessions in New York with a French-speaking photographer★ 5.0 · 60 reviews
- Brooklyn Bridge Dumbo Walking Tour with Photography Experience★ 5.0 · 12 reviews
- New York Flying-dress photoshoot with iconic NYC views★ 4.5 · 12 reviews
- Brooklyn Bridge & Neighborhoods – 2-Hour Photo Shoot Tour★ 5.0 · 4 reviews
Keep Going in Brooklyn
- Brooklyn Food Walking Tour: Local Eats & Family‑Run Shops★ 5.0 · 592 reviews
- NYC: Brooklyn Graffiti Workshop with Local Artist★ 4.8 · 570 reviews
- Brooklyn Bridge & DUMBO Food Tour: Local Eats & Landmarks★ 5.0 · 478 reviews
- Brooklyn: Bushwick Street Art Walking Tour★ 4.7 · 462 reviews
- All Inclusive Airport Departure Transfer NYC/ Brooklyn/Queens★ 4.0 · 342 reviews
Bridge and Back: More DUMBO Walks
- Brooklyn Bridge & DUMBO Food Tour: Local Eats & Landmarks★ 5.0 · 478 reviews
- From Manhattan: 2-Hour Brooklyn Bridge Bike Tour★ 4.4 · 230 reviews
- NYC: Brooklyn Bridge and Dumbo District Walking Tour★ 4.7 · 200 reviews
- Brooklyn Heights, DUMBO and Brooklyn Bridge guided tour in French★ 5.0 · 117 reviews
- Manhattan and Brooklyn Bridge Bicycle Tour★ 4.5 · 60 reviews
Just in: the newest Brooklyn reviews on our desk

Brooklyn Bridge & DUMBO Tours, compared.
 ★ 5.0Brooklyn Bridge & DUMBO Neighborhood Tour – from Manhattan to BrooklynFrom $49826 reviews
 ★ 5.0Brooklyn Bridge & DUMBO Food Tour: Local Eats & LandmarksFrom $69478 reviews
 ★ 4.4From Manhattan: 2-Hour Brooklyn Bridge Bike TourFrom $59230 reviews
 ★ 5.0Walking tour in Manhattan Brooklyn Bridge and WaterfrontFrom $29222 reviews
 ★ 4.7Brooklyn Bridge and Dumbo District Walking TourFrom $49200 reviews
 ★ 4.5Brooklyn Bridge and Dumbo Guided Walking TourFrom $34186 reviews
 ★ 4.5Brooklyn Bridge and Waterfront 2-hour Guided Bike TourFrom $59184 reviews
 ★ 5.0Brooklyn Bridge Waterfront Guided Bike TourFrom $59126 reviews
Browse the lists this tour appears in