
Reviewed · NYC PHOTOSHOOTS
Manhattan Architecture Photography Tour
Turning street scenes into sharp compositions.
This Manhattan Architecture Photography Tour is a fast, focused way to get better photos of NYC landmarks without guessing at angles. I like that it pairs famous backdrops with practical instruction from a pro photographer guide (Zim), and it keeps you moving to the spots you might miss on your own.
You’ll especially like the hands-on tuition and the emphasis on angles—the kind of coaching that helps you stop shooting generic frames and start removing boring space. You also get a short set of concentrated stops, so you’re practicing techniques while the city is still in front of you, not just collecting sightseeing.
One consideration: the whole thing runs about 3 hours, and some stops are brief. If you want long, slow time at each location or you’re new and still fiddling with camera settings, you’ll need to work a little fast.
In This Review
- Key highlights worth planning for
- Price and what you’re really paying for
- Starting at Pershing Square: getting your bearings fast
- Stop 1: Grand Central Terminal photos (and why this first stop works)
- Stop 2: Chrysler Building angles in a quick 10 minutes
- Stop 3: Times Square light and motion in 15 minutes
- Stop 4: New York Public Library exterior in a focused 15 minutes
- Stop 5: Bryant Park and shooting toward the Empire State Building
- Extra photo stops around Pershing Square Signature Center and Broadway-area sights
- Group size, pacing, and walking reality
- Who this tour is for (and who should skip it)
- Weather and what happens if the city doesn’t cooperate
- Practical tips before you go (so you actually use the instruction)
- Should you book this Manhattan architecture photography tour?
- FAQ
- How long is the Manhattan Architecture Photography Photography Tour?
- What landmarks are included on the tour?
- Is admission included anywhere?
- What does the tour cost?
- What’s included with the price?
- Do I need to bring a camera?
- How big is the group?
- Is the tour suitable for beginners?
- What if the weather is bad?
- Can I cancel for a full refund?
Key highlights worth planning for
- Pro photo instruction from Zim that adapts to your level, including patience for novices
- Angle-finding help for major landmarks, so your shots look intentional instead of accidental
- Timed bursts at each site (Grand Central, Chrysler Building, Times Square, NYPL exterior, Bryant Park) that keep practice moving
- Times Square light-and-motion coaching for capturing the lights and the hustle
- Small group size (max 8), which makes it easier to get personal tips while walking
- Public-transport-friendly meeting point near Pershing Square, with the tour ending elsewhere
More frames of your trip, shot by a pro
- NYC Professional Photoshoot and Walking Tour with Private Guide
★ 5.0 · 608 reviews - New York Icon Photography Tour led by a Local Photographer
★ 5.0 · 155 reviews - New York: 1-hour Photoshoot in Iconic Locations
★ 5.0 · 101 reviews - Central Park Photography Tour with Local Photographer
★ 5.0 · 85 reviews
Price and what you’re really paying for
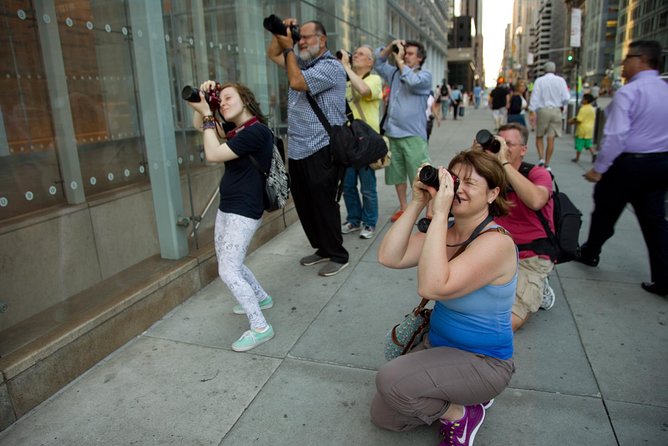
At $125 per person for about 3 hours, this tour isn’t cheap in the “just a walking tour” sense. But you’re paying for two things that matter in photography: time with a pro guide and structured practice at high-stakes locations.
The guide isn’t just telling you where to stand. The coaching focuses on camera use you may not be tapping yet, plus practical composition skills like angle choice and eliminating boring space. That’s the difference between coming away with a few decent vacation photos and leaving with a repeatable method you can use on future trips.
Also, the group limit (max 8) matters. When only a handful of people are in the mix, you’re more likely to get quick corrections instead of watching from the sidelines.
Starting at Pershing Square: getting your bearings fast
The tour meets at 90 E 42nd St at Pershing Square. That’s a smart launch point because it puts you in the Midtown flow right away. You’ll be walking through dense, photo-rich Manhattan, and the guide structure helps you avoid the most common solo mistake: wandering, shooting, and realizing later your angles were off.
Since the tour ends in a different location, plan to have your onward plans nearby or be ready for an easy transit hop. You’ll want to keep your head in the game, because the route is built around short, purposeful stop times.
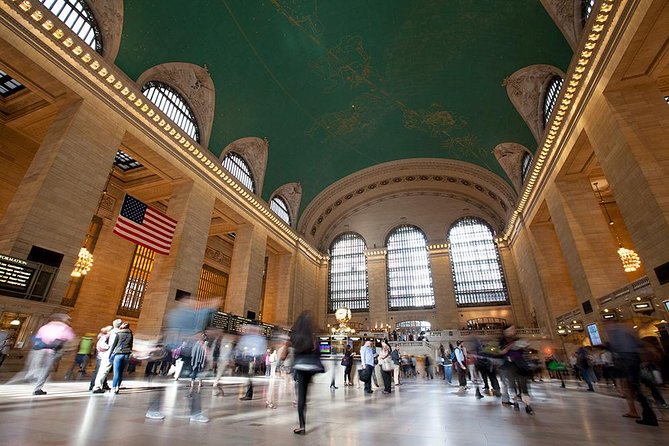
Stop 1: Grand Central Terminal photos (and why this first stop works)
The tour begins with Grand Central Terminal, with about 20 minutes allotted and entry included. This is a great first target because it’s iconic, architectural, and visually complex, which means it’s ideal for learning composition quickly.
In a short session like this, the instruction style is the point. The guide coaching (including recommendations tuned to your skill level) helps you use your camera more effectively rather than just pressing the shutter and hoping. If you’ve ever felt like your camera can do more than you’re using, this kind of start is where that clicks.
Practical tip for you: before you arrive, decide what your camera goal is for this stop. For example, you might focus on getting a clean, centered frame or on using angles to reduce clutter. With only 20 minutes, you’ll get better results by committing to one approach instead of trying ten different things.
Possible drawback: because it’s a concentrated session, you may feel rushed if you’re still learning basic settings. The guide can be patient, but you’ll still need to move quickly between shots.
Worth a look right next to this New York City pick:
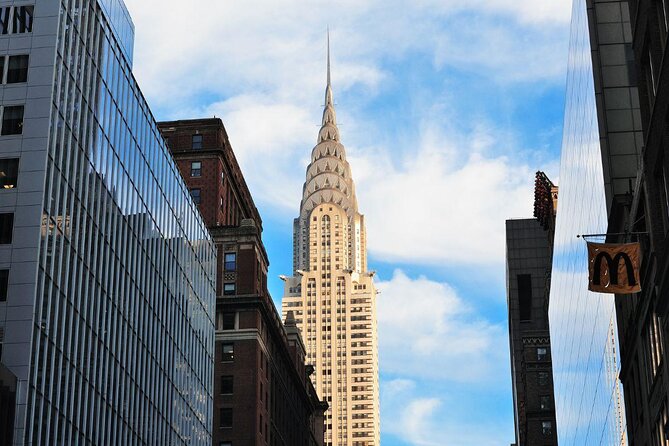
Stop 2: Chrysler Building angles in a quick 10 minutes
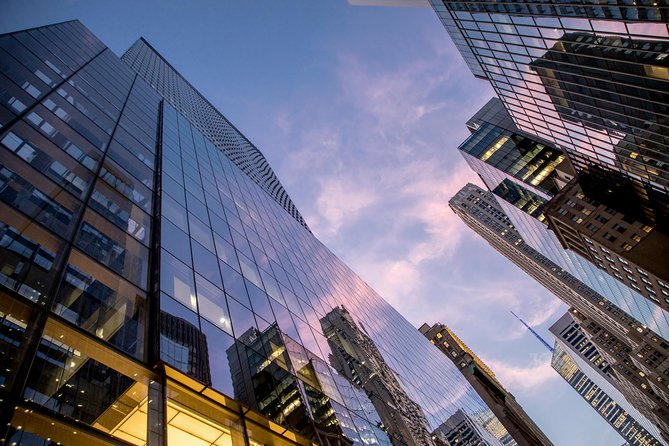
Next is the Chrysler Building, about 10 minutes, with admission listed as free. This is a classic architecture photography challenge: you need to find strong lines and a flattering viewpoint fast, because the best-looking frames are often tied to a specific angle.
The value here is not the building itself—it’s the guidance on where to stand. If you’ve ever photographed the Chrysler Building and felt like your images look similar to everyone else’s, the tour’s focus on the best angles can help you break that pattern.
Practical tip for you: bring at least one “backup” composition in your head before the stop begins. That way, if the angle you want is blocked or crowded, you can switch quickly without losing time.
Stop 3: Times Square light and motion in 15 minutes
Times Square is next, with about 15 minutes and admission listed as free. This stop is where you learn to capture the lights and the hustle and bustle—two things that normally fight each other in a photo.
The coaching matters because shooting Times Square well often requires more than pointing and framing. You need a plan for what to emphasize: bright lights, movement, or a specific subject within the chaos. The tour structure helps you practice that logic instead of guessing.
What I like here is that Times Square is also a reality check for many photographers. You’ll learn how to work in a noisy visual environment and still produce an image that feels intentional, not accidental.
Possible drawback: crowds and constant motion are part of Times Square. If you’re someone who needs long, quiet time to compose, the 15-minute window may feel short. But that’s also why the tour is efficient—you’re learning the method, not just collecting photos.
Stop 4: New York Public Library exterior in a focused 15 minutes
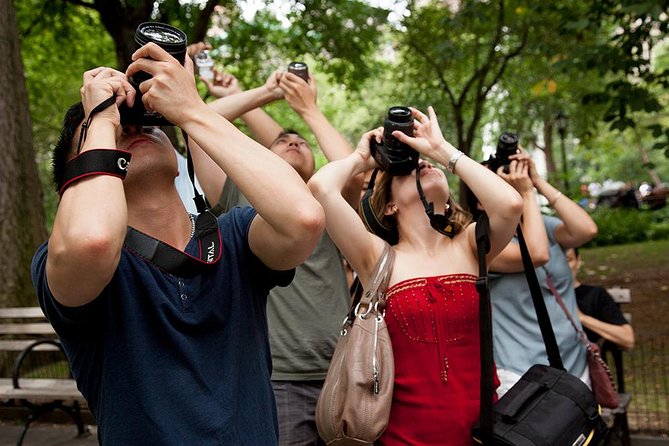
The New York Public Library exterior is the next stop, about 15 minutes, and it’s described as the chance to record an amazing exterior. This session is a shift from the energy of Times Square and back toward “classic architecture framing.”
This is a good place for you to apply what you learned earlier about eliminating boring space. The feedback highlight about getting better at removing empty, unhelpful areas is exactly the skill you’ll want here—library exteriors can look impressive even with simple framing, but strong images usually come from tighter composition choices.
Practical tip for you: at this type of exterior, try taking a series of frames from slightly different positions rather than one perfect attempt. In 15 minutes, small changes in viewpoint can make a big difference in how clean your final image looks.
Stop 5: Bryant Park and shooting toward the Empire State Building
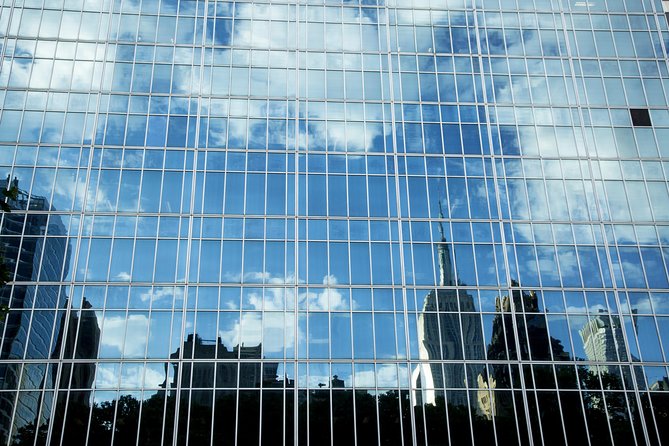
Then you hit Bryant Park, about 15 minutes. This stop is aimed at achieving brilliant shots of the Empire State Building, and entry/admission is listed as included.
Bryant Park is useful for photography because it gives you a clear “destination” shot target (Empire State Building) while still offering a sense of place. You’re not just photographing one object; you’re photographing a connection between landmarks and Manhattan’s overall layout.
If you’re newer, this is also a confidence-builder stop. You can practice getting a strong skyline view while the guide helps you choose angles that don’t waste space. If you’re more advanced, it’s still valuable because it encourages you to refine viewpoint choices—what changes a photo from okay to strong is often where you place the frame elements.
Possible drawback: depending on timing and how crowded the area feels, you may have limited freedom to experiment. The guide helps you work within reality, which is exactly what you want to learn.
Extra photo stops around Pershing Square Signature Center and Broadway-area sights
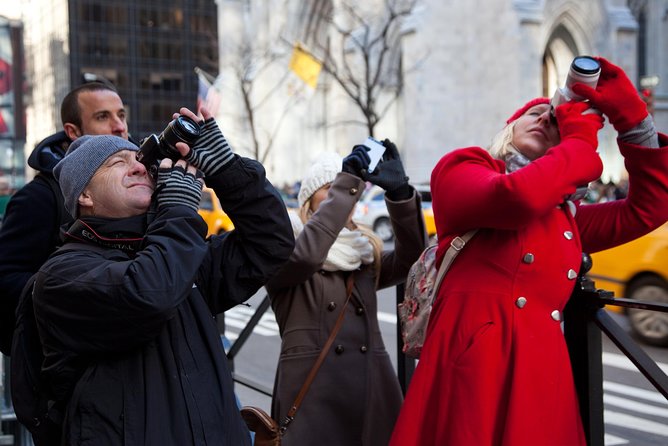
Between the listed landmarks, the tour also includes time to photograph the Pershing Square Signature Center, described as a complex of three theaters just off Broadway. There’s also time to take in one of Manhattan’s most famous sights, plus time in the heart of Times Square.
These extra moments matter because they fill the gaps between the biggest postcard buildings with more street-level “architecture in context.” That’s where a lot of photographers start building a style that feels less generic.
Practical tip: treat these extra segments as practice for quick framing. In real NYC conditions, you rarely have unlimited time at a perfect spot. Learning to work fast is part of what makes a photo tour worth it.
Group size, pacing, and walking reality
This experience is capped at 8 people, and the physical fitness level is described as moderate. That combination usually means two things: you’ll walk, and you won’t spend ages parked in one location.
The pacing is likely to feel friendly if you’re open to movement and you’re ready with your camera basics. If you’re brand new, the good news from the feedback is that Zim is described as fun, dynamic, and patient—people appreciated attention even at novice levels, plus helpful recommendations.
If you’re planning your own prep, do this:
- Charge your devices and make sure your camera mode is ready
- Decide ahead of time whether you want wide, mid, or tight framing so you’re not switching constantly
- Wear shoes you can walk in without thinking about it
Who this tour is for (and who should skip it)
This tour fits you best if you:
- Want pro-level angle advice at major Manhattan landmarks
- Have a camera and want help using features you’re not fully using yet
- Prefer structured practice over wandering with no plan
- Like shooting in iconic areas but want your photos to feel more personal
It may be less ideal if you:
- Want to sit and linger at one location for a long stretch
- Are deeply focused on one niche lens/technique and feel limited by short stops
- Don’t want any walking at all (the tour’s moderate physical level suggests movement)
Weather and what happens if the city doesn’t cooperate
The tour requires good weather. If it gets canceled due to poor weather, you’ll be offered a different date or a full refund. That’s important in NYC, where plans can change fast.
My suggestion: if you book a date, keep your schedule flexible if possible. If you’re going during a wetter season, consider choosing days where you have backup time.
Practical tips before you go (so you actually use the instruction)
Here are a few smart things you can do that match the tour’s teaching style and your results:
- Bring your own camera (digital camera isn’t included). If you plan to use multiple lenses, set them up before you meet.
- Pick one or two habits to work on. Based on feedback, the big wins come from applying angles and cutting boring space.
- Ask for specific recommendations. The instruction is described as adapting to your interest and skill level, so the more you tell the guide what you want to photograph, the more targeted the help can be.
- Expect walking. This is a “move and practice” experience, not a sit-down workshop.
Should you book this Manhattan architecture photography tour?
Book it if you want to turn Manhattan icons into photographs with stronger composition and fewer empty frames. The strongest selling point is the pro photographer guidance—especially the way Zim’s coaching is described as patient and attentive, including for novices, plus the practical focus on angles and camera abilities you might not be using.
Skip it only if your style depends on long, quiet sessions at a few locations, or if you dislike walking during a short, timed route. With this tour, you’re trading slow looking for fast learning. For many people, that’s exactly the bargain: you’re not just sightseeing—you’re getting a method you can use again.
FAQ
How long is the Manhattan Architecture Photography Photography Tour?
It runs for about 3 hours.
What landmarks are included on the tour?
The tour includes Grand Central Terminal, the Chrysler Building, Times Square, the New York Public Library exterior, and Bryant Park. It also includes time around the Pershing Square Signature Center and additional time in the Times Square area.
Is admission included anywhere?
Entry/admission is included for Grand Central Terminal. Entry/admission is also listed for Bryant Park and Times Square. Chrysler Building and Times Square are listed as free in the stop details, while Grand Central Terminal and Bryant Park are explicitly included for admission.
What does the tour cost?
The price is $125.00 per person.
What’s included with the price?
You get a professional photographer guide. Entry/admission is included for the specified stops (Grand Central Terminal, Bryant Park, and Times Square).
Do I need to bring a camera?
Yes. A digital camera is not included.
How big is the group?
The tour has a maximum of 8 travelers.
Is the tour suitable for beginners?
Yes. The tour is described as an easy way for all levels to learn pro tips and techniques, and feedback highlights patient attention for novice photographers.
What if the weather is bad?
The experience requires good weather. If it’s canceled due to poor weather, you’ll be offered a different date or a full refund.
Can I cancel for a full refund?
Yes. You can cancel up to 24 hours in advance for a full refund. If you cancel less than 24 hours before the start time, the amount paid is not refunded.
More Tours in New York City
- Statue of Liberty and Ellis Island Tour: All Options★ 5.0 · 13,571 reviews
- New York in One Day Guided Sightseeing Tour★ 5.0 · 13,166 reviews
- Central Park Pedicab Guided Tours★ 5.0 · 7,108 reviews
- New York City: Manhattan Helicopter Tour★ 4.7 · 7,076 reviews
- Private Central Park Pedicab Tour★ 5.0 · 6,981 reviews
More Tour Reviews in New York City
- NYC: SUMMIT One Vanderbilt Tickets★ 4.7 · 51,195 reviews
- NYC: Empire State Building Tickets – Observatory & Museum★ 4.7 · 25,757 reviews
- New York City: Statue of Liberty & Ellis Island with Ferry★ 4.6 · 18,683 reviews
- New York City: American Museum of Natural History Ticket★ 4.5 · 15,447 reviews
- Statue of Liberty and Ellis Island Tour: All Options★ 5.0 · 13,571 reviews
Your New York City Trip, Shot by a Pro
- NYC Professional Photoshoot and Walking Tour with Private Guide★ 5.0 · 608 reviews
- New York Icon Photography Tour led by a Local Photographer★ 5.0 · 155 reviews
- New York: 1-hour Photoshoot in Iconic Locations★ 5.0 · 101 reviews
- Central Park Photography Tour with Local Photographer★ 5.0 · 85 reviews
- Iconic New York City Photography Tour★ 5.0 · 61 reviews
Just in: the newest New York City reviews on our desk


NYC Photoshoots, compared.
 ★ 5.0NYC Professional Photoshoot and Walking Tour with Private GuideFrom $350608 reviews
 ★ 5.0New York Icon Photography Tour led by a Local PhotographerFrom $125155 reviews
 ★ 5.01-hour Photoshoot in Iconic LocationsFrom $150101 reviews
 ★ 5.0Central Park Photography Tour with Local PhotographerFrom $10085 reviews
 ★ 5.0Iconic New York City Photography TourFrom $19261 reviews
 ★ 5.0Photo sessions in New York with a French-speaking photographerFrom $19660 reviews
 ★ 4.9Your NYC Story in Photos: Custom 2-Hour Tour & Photo ShootFrom $35060 reviews
 ★ 4.8Professional Photoshoot at Brooklyn BridgeFrom $24746 reviews
Browse the lists this tour appears in